Wound Management: Tie-Over Bandages
Karen M. Tobias, DVM, MS, DACVS, University of Tennessee
Jarvon Tobias, DVM, University of Tennessee
Bandaging plays several critical roles in wound management, including protection against infection, contamination, or trauma; application of topical medications; and maintenance of an appropriate wound environment. Bandaging techniques can vary by the location of the wound and function of the bandage. Although many wounds can be covered with encircling bandages, some require more specialized bandaging.
Indications
Tie-over bandages are often the ideal choice for placement over wounds in areas that are mobile, difficult to cover, or lack sufficient local skin for tension-free primary closure. They are particularly useful for wounds near the hind end and the middle or upper portions of extremities.
Tie-over bandages can be placed in a manner that allows the anus and external genitalia to remain uncovered, reducing the risk for contamination. In addition, unlike encircling bandages, tie-over bandages maintain their position on extremities during motion, thereby reducing the risk for lymphedema and venous obstruction of distal extremities that commonly occur with slippage of encircling bandages.
When placed under tension, tie-over bandages can also be used to stretch local skin before wound closure. In some regions, such as the trunk, an additional 10 to 20 cm of skin may be “recruited” within 3 to 4 days when bandage lacings are tightened q8–12h. When skin is under constant tension, collagen fibers rapidly realign in the direction of the tensile force. Further elongation may occur beyond that point because of fragmentation of elastic fibers and displacement of water from the surrounding collagen network. This stretching phenomenon, known as mechanical creep, may be accompanied by cellular growth, tissue regeneration, and increased vascularity. All these factors can result in expansion of healthy skin used to close wounds.
Tie-over bandages can also be placed temporarily over wounds that have been primarily closed, thereby adding an extra layer of protection or reducing tension on the incision line.
Considerations
Tie-over bandages are relatively easy to place. Nonsurgical methods include application of Velcro-covered adhesive pads on the skin; elastic cables are stretched between the pads and tightened as needed. In patients with smaller wounds or those undergoing anesthesia for wound management, suture loops can be surgically placed around the wound to act as eyelets or grommets for lacing the dressing in place, as described here.
Frequency of bandage changes depends on the character of the wound. Owners with financial constraints can be taught to change the bandages at home so that veterinary costs can be directed toward performing cultures or blood work for other critical needs.
Complications
Complications of tie-over bandage placement can include skin necrosis, focal infections around the suture sites, or suture loop failure. Suture loops must be placed far enough from the edge of the wound that they do not overlap or pull through the wound margin or obstruct the local blood supply. Local necrosis can occur if loops turn into slip knots or are acutely placed under excessive tension during bandaging. Because they are expected to eventually break when under tension, a few extra loops should always be placed. Animals should wear Elizabethan collars or other devices to prevent self-trauma until the wound has healed.
Step-by-Step: Tie-Over Bandaging
What You Will Need
Sterile gloves
Monofilament nonabsorbable suture (preferably on a cutting needle)
Needle holders
Mayo scissors
Sterile absorptive bandage material
Ties (eg, umbilical tape, shoelaces, or heavy suture material)
Optional Equipment
Hemostats
Sterile syringe
Translucent adhesive drape
Step 1
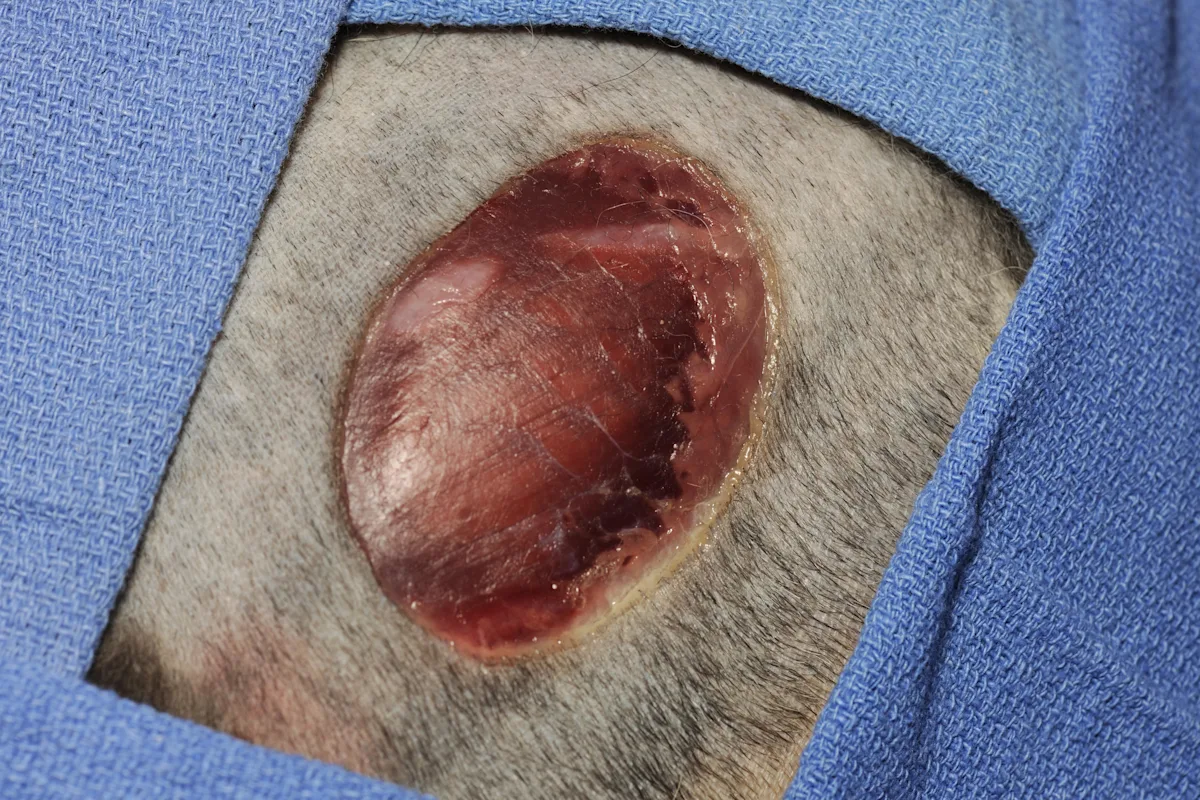
Clip, prepare, and drape the wound to provide a sterile field. If needed, obtain culture and biopsy samples at this time.
Author Insight
For skin stretching, local skin should be undermined before placement of suture loops.
Step 2
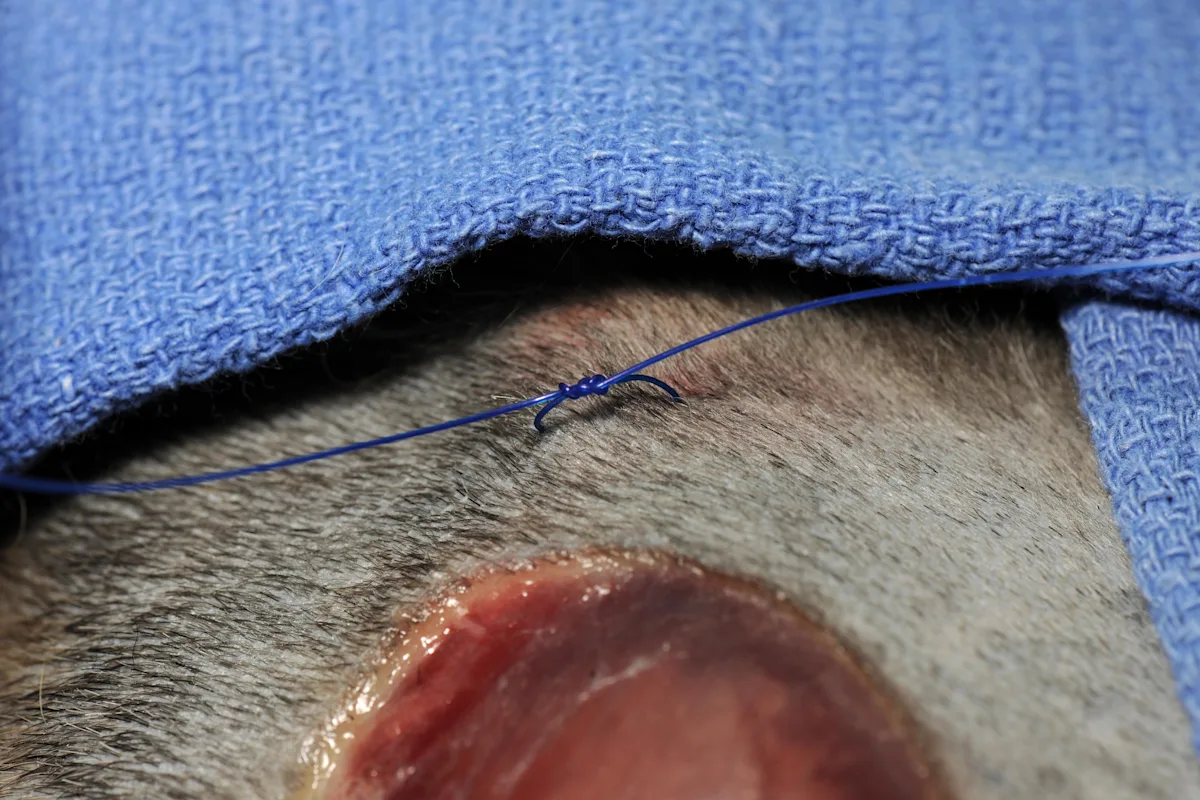
Using 0 monofilament nonabsorbable suture, take a full-thickness bite of skin 1.5 to 3 cm from the wound edge. Tie 1 or 2 knots so the suture forms a slightly loose loop within the skin, leaving tags at least 3-cm long.
Author Insight
Because of the memory of 0 monofilament suture material, an extra knot may be required to help secure the suture and prevent hitching.
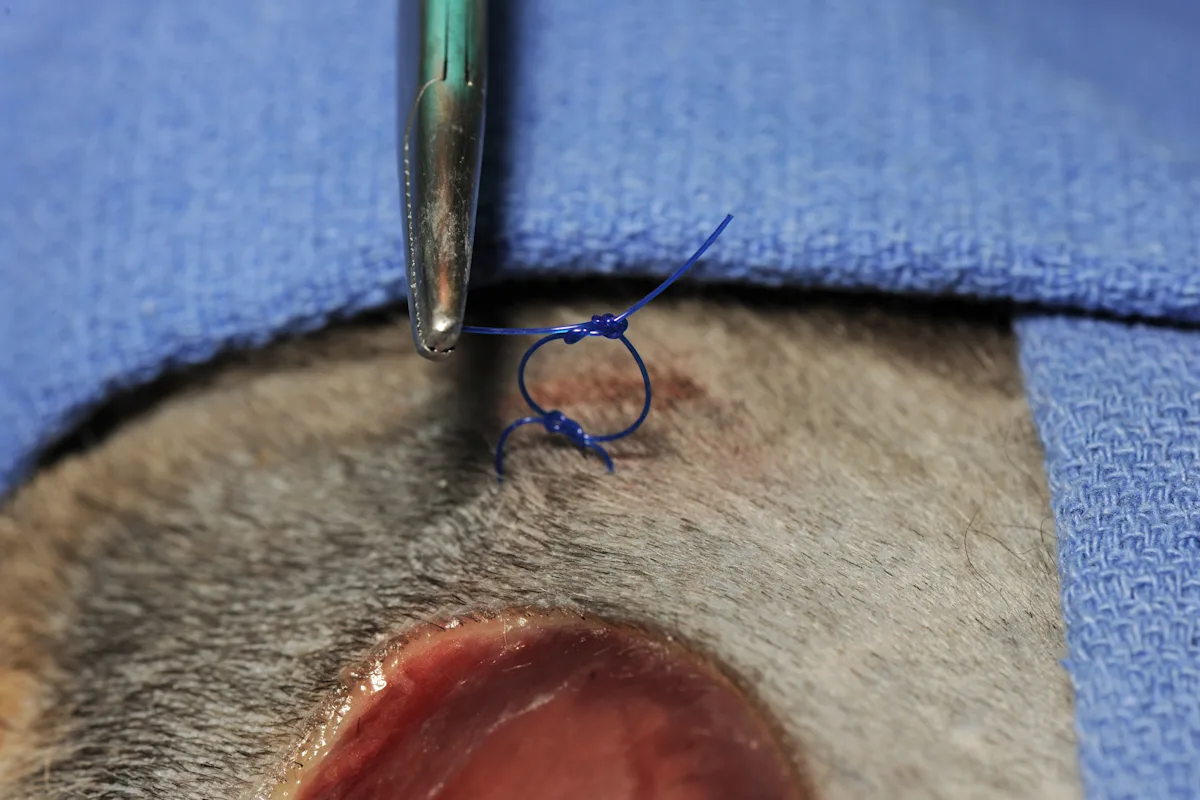
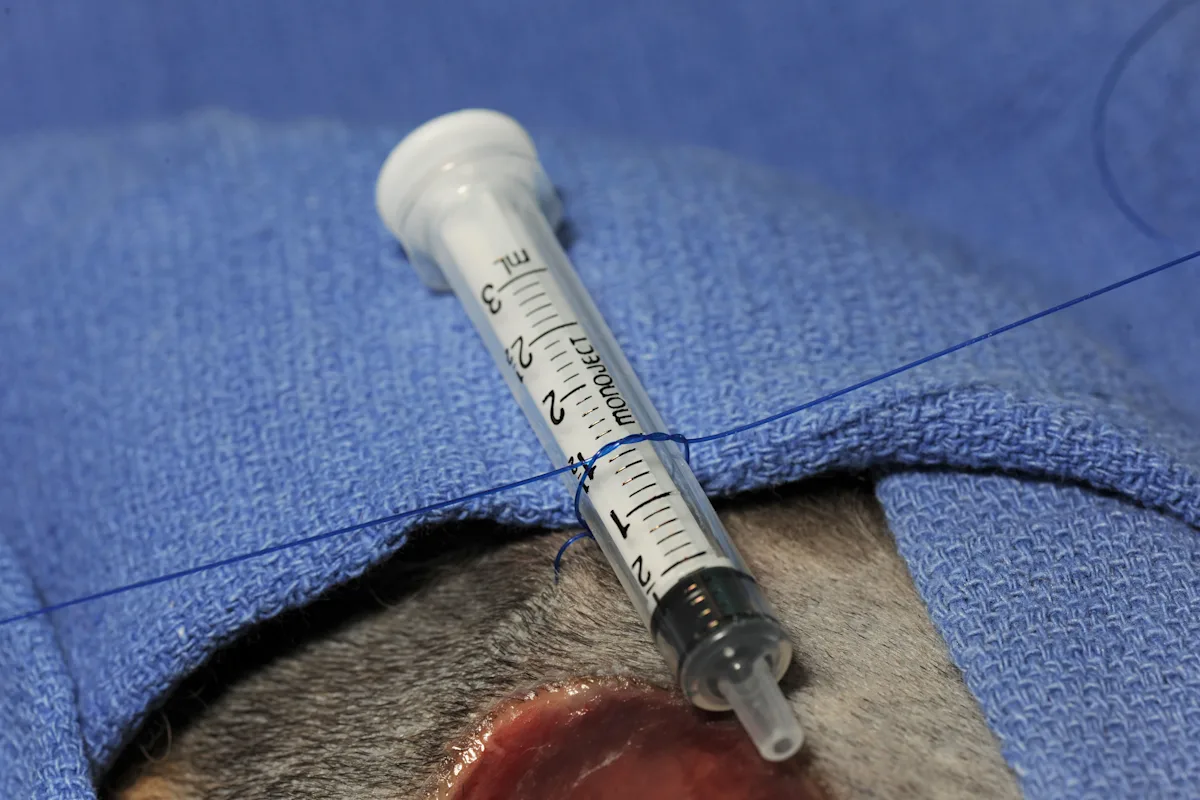
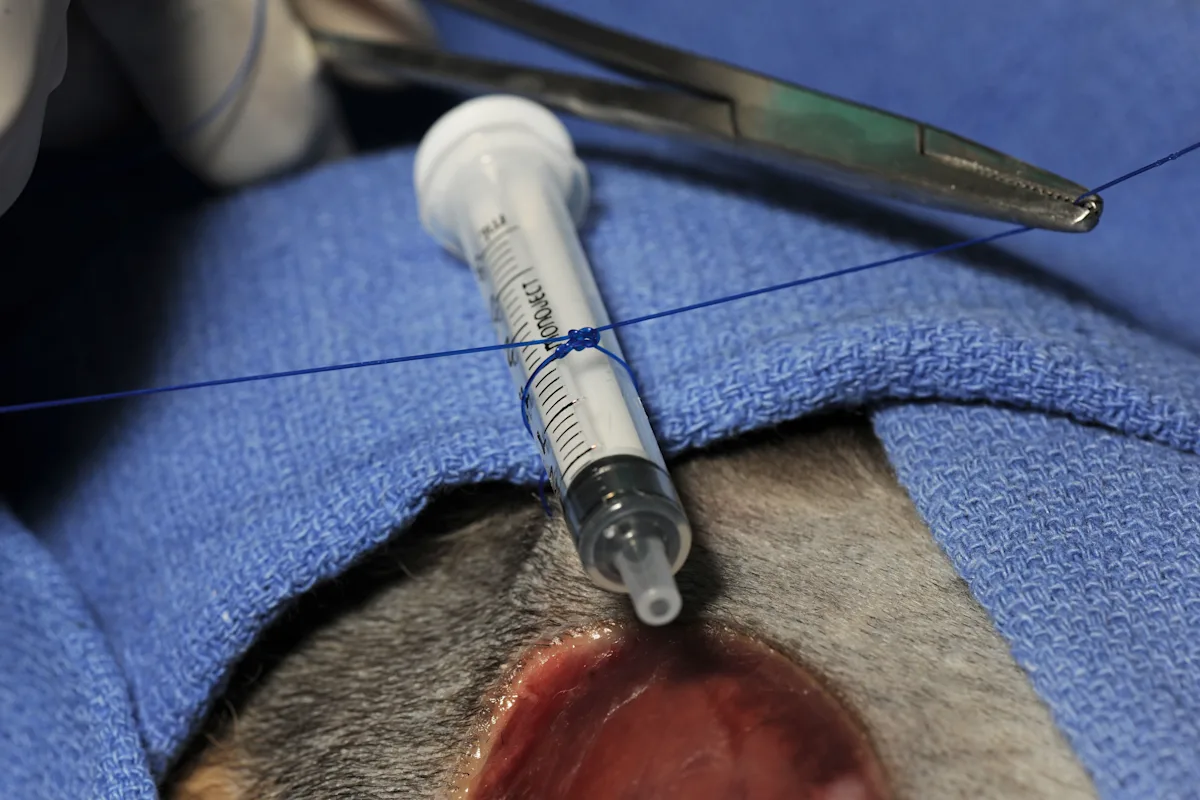
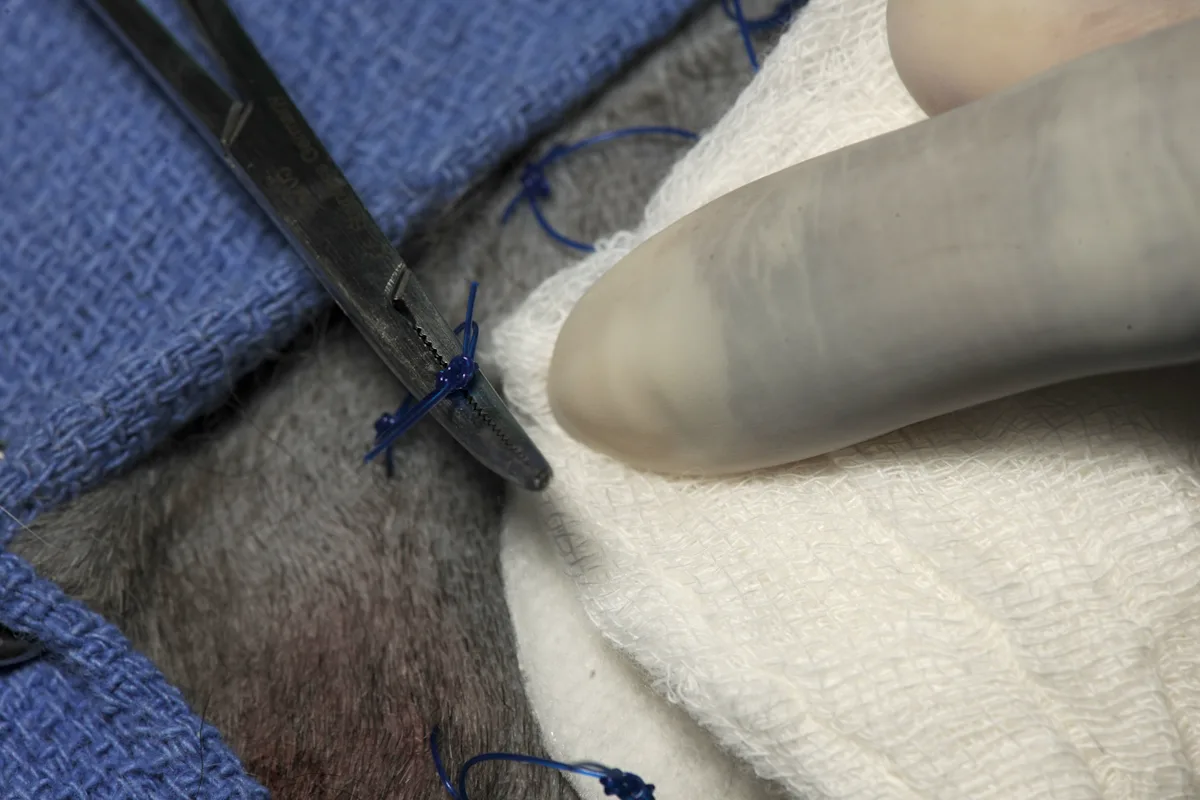
Step 3
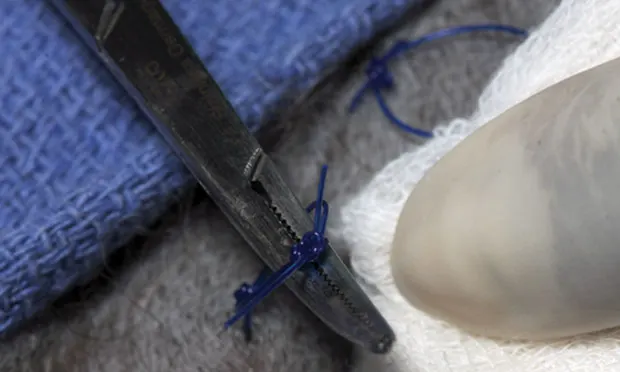
Create an eyelet loop 1 to 1.5 cm in diameter by tying a second set of 4 simple throws, starting at least 1.5 cm from the initial knot(s). (A) Tie the first throw to produce the desired diameter of the loop; carefully tie the second throw over the first to keep the knot square, then tighten the third and fourth throws down to the second throw to produce a final square knot. Pull the suture ends evenly to prevent hitching.
(B) If suture memory causes half-hitching, use a sterile syringe to maintain the shape of the loop while tying the final knots. After taking the skin bite and tying the initial knot(s), place a 3-mL syringe over the knot(s) and then tighten subsequent throws over the syringe. (C) Tighten the throws so that the final knot is square. Then remove the syringe from the loop.
Author Insight
Tightening the second throw to the first is likely to result in either half-hitching or narrowing of the loop.
An additional person may be needed to hold the syringe in place while the loop is applied.
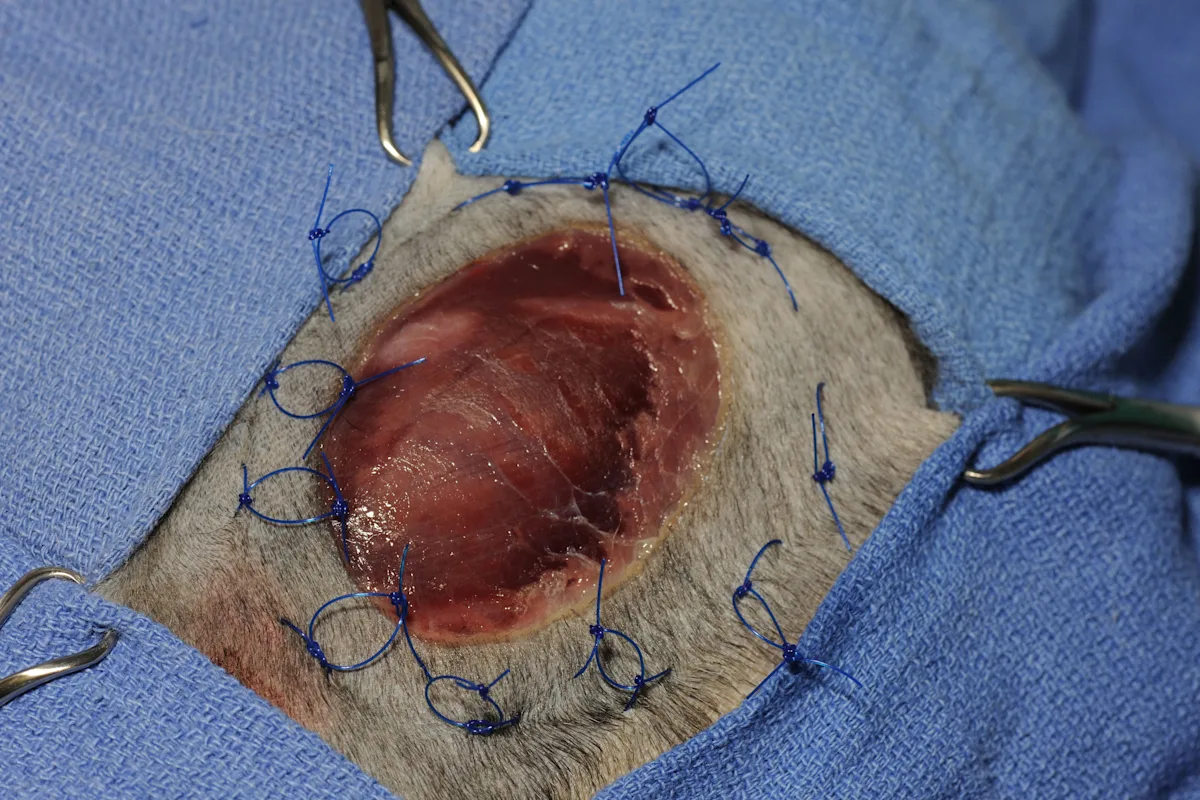
Step 4
Place additional loops as needed to surround the wound with loops.
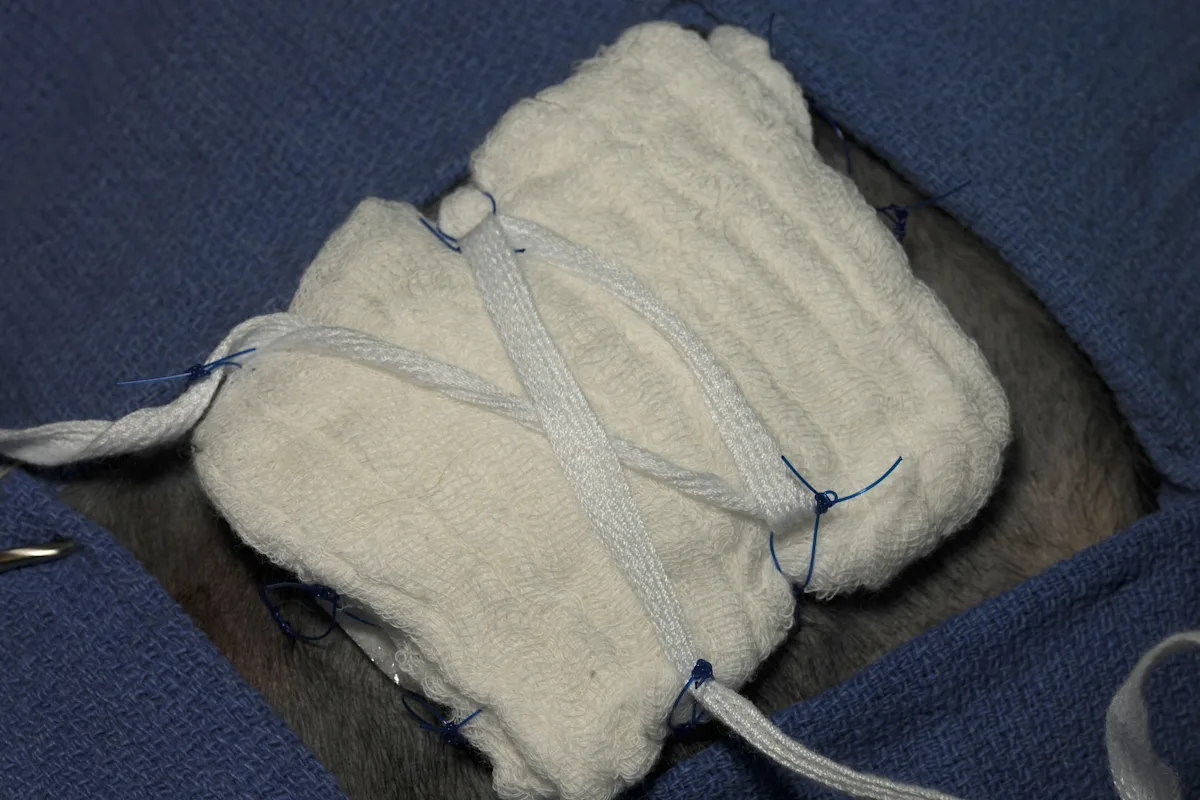
Step 5
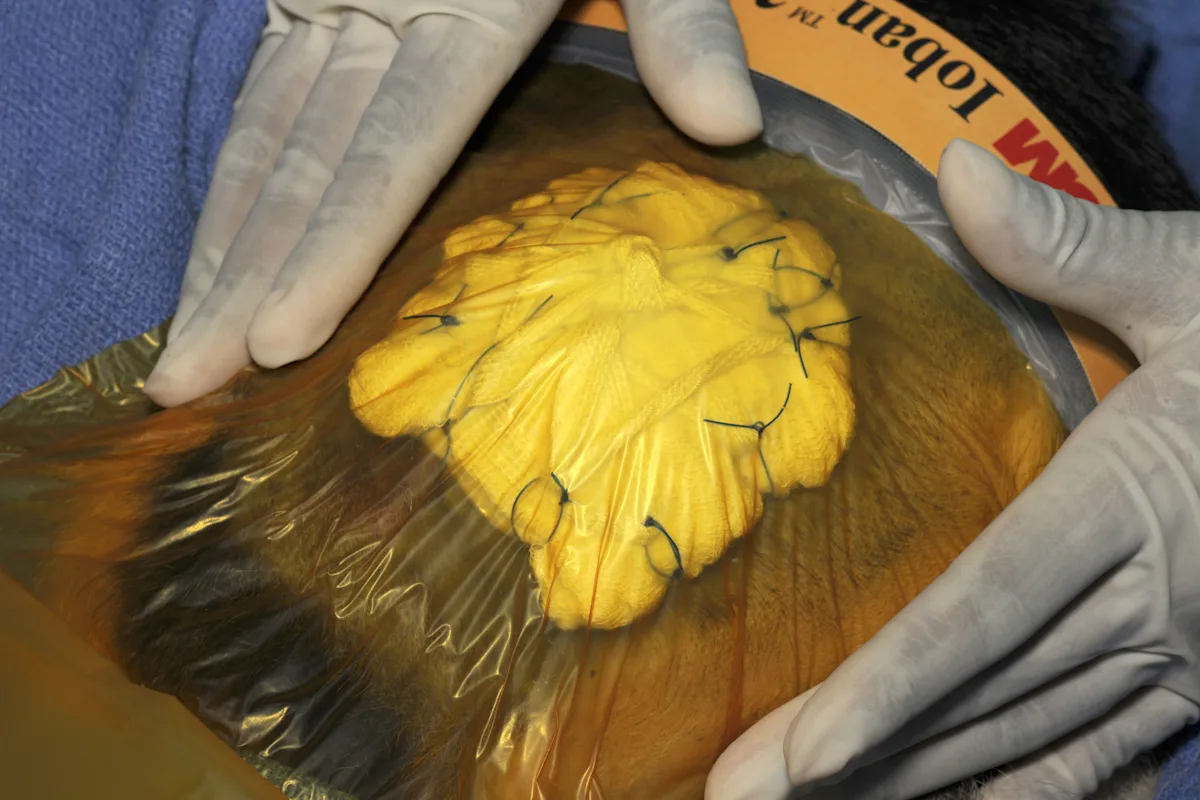
Cover the wound with primary and absorptive dressings. Lace sterile umbilical tape through the loops by inserting a hemostat or needle holder through one loop and grasping the free end of the tape.
Step 6
Criss-cross the initial piece of umbilical tape over the dressing to hold it in place, then tie it with the desired amount of tension.
Author Insight
To stretch the skin using the tie-over bandage, the umbilical tape is secured in a bow or with an adjustable fastener (eg, safety pin) and is not covered with additional bandage material. If heavy suture is used for lacing, it can be held in tension with a split shot or “Carolina keeper” (instruments used to secure fishing line). Lacings are tightened gradually q8–12h.
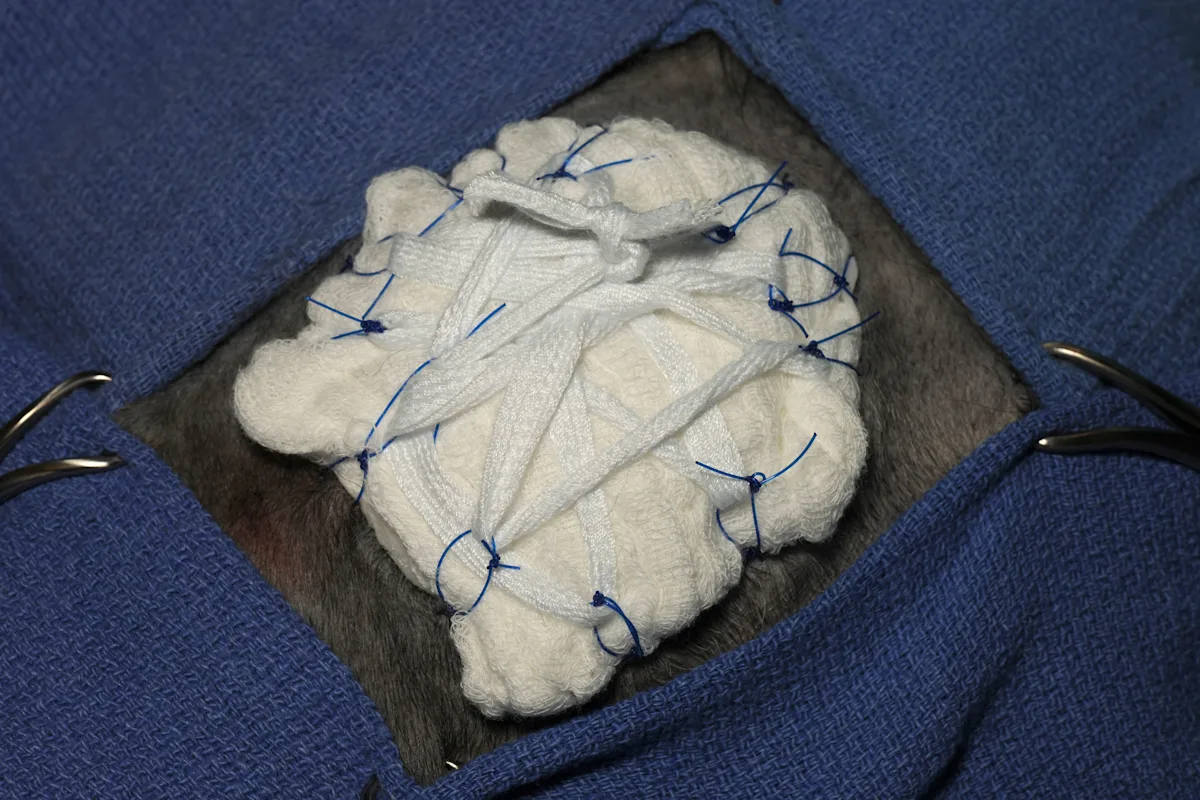
Step 7
Add and tie more laces at angles to the first one to provide a bandage that is secured in all directions.
Step 8
If desired, cover the tie-over bandage with a final layer of translucent adhesive drape to keep the wound moist and prevent contamination. During dressing changes, cut the adhesive drape around the circumference of the dressings, being careful to avoid cutting the loops. Then secure subsequent adhesive drape to the initial piece. Most animals will require sedation during bandage changes.