Top 5 Guiding Points for Teeth Scaling
Jan Bellows, DVM, FAVD, DAVDC, DABVP, All Pets Dental, Weston, Florida

Rylee, the author’s recently adopted one-and-a-half-year-old German shorthaired pointer, needed professional dental care to treat noticeable plaque and tartar on her cheek teeth with concurrent gingivitis (Figure 1). Halitosis was also noted.
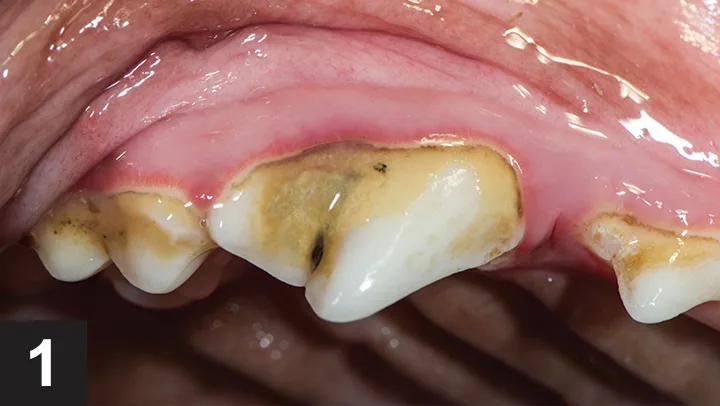
Rylee’s right upper cheek teeth with gingivitis secondary to excessive plaque and tartar.
Rylee was fortunate to have her teeth professionally cleaned at a specialty dental practice. The following 5 guiding points can help ensure that every patient’s teeth are cleaned with similar expertise.
1. Sterilize the tip before each use
Sterilize each ultrasonic tip before use on a patient to prevent cross-contamination—fortunately, sterilization is easy and cost-effective. It is important that you follow the manufacturer’s cleaning and sterilization recommendations.
Magnetostrictive inserts and piezoelectric (ie, piezo) tips should be cleaned of gross debris, disinfected, rinsed with water, and immersed in an ultrasonic instrument-cleaning unit. After removal from the unit, the inserts or tips should be rinsed with water and dried before they are packed and sterilized in a steam autoclave or gas sterilizer.
Keep on hand at least 4 times the average number of tips used daily, in case a tip is dropped or damaged. Proper storage is important for keeping instruments sterile before use. Standard autoclave bags provide a sterile environment (Figure 2), but the tips can penetrate the paper bags, so handle them with care to avoid tearing and damaging the pouches. Metal or plastic autoclavable instrument cassettes are ideal for storing magnetostrictive inserts and provide a secure environment for the stack and tip. Some piezo tips are stored in protective, color-coded carriers that also double as tightening wrenches, which reduce the risk of losing small tips and make it easier to quickly identify the type of tip needed for each specific use.
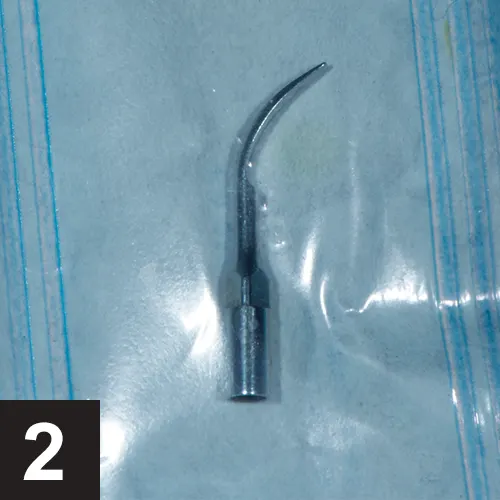
Sterilized piezo ultrasonic tip.
2. Choose the correct tip
Choosing the correct tip for the part of the tooth you are cleaning (eg, supragingival, subgingival) is essential, because improper use can damage the patient’s teeth and gingiva (see Figure 3 for 2 commonly used tips). Tips used above the gingiva (eg, P-10 Beavertail) are generally wider than the tips used subgingivally. The iM3 thin, long, titanium ferrite rod tips can be safely used both above and below the gumline.
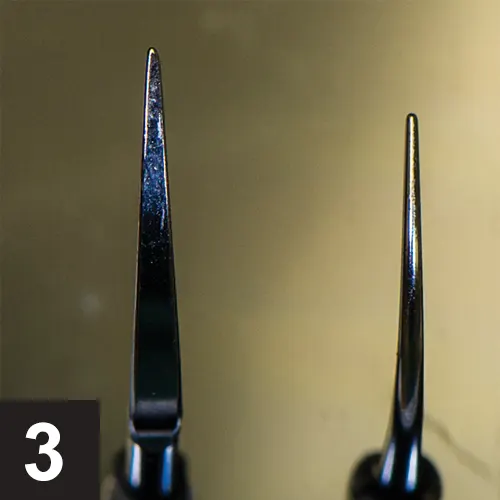
Left: tip for gross calculus removal; right: tip for periodontal pocket cleaning
When scaling subgingivally, increase the water flow and decrease the power. Higher power settings may result in iatrogenic tooth damage and tip fracture.
To appreciate the tip’s heat, briefly grasp the tip while it is operational. The degree of heat generated will surprise you. Constant motion during dental scaling is recommended, because leaving the tip in one area too long can damage the tooth and surrounding gingiva.
3. Examine the tip before each scaling
Evaluating tip wear before each use is critical for safe and effective use of scaling instruments. A loss of 1 mm is equal to a 25% loss of cleaning efficiency; a tip with a 2-mm loss equals a 50% loss in efficiency and should be replaced. Most manufacturers provide a guide (Figure 4).
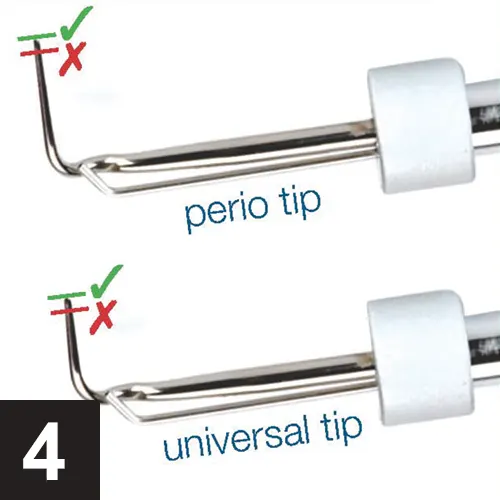
iM3 tip guide
4. Use the side of the tip
A piezo tip is activated when electricity is passed over the surface of crystals housed within the handpiece. Activated piezo tips move in a linear fashion, like erasing a chalkboard, with only the last 3 mm of the tip in motion. Magnetostrictive insert tips, on the other hand, have an elliptical, figure-of-eight pathway, with the last 4 mm of the tip active. The ferrite rod tip is equally active on all sides of the 12-mm tip.
The most powerful surfaces of the scaler’s tip are the underside and the top; the lateral sides are the least active. To prevent trauma to the tooth’s surface, use only the sides of the tip to remove plaque and calculus above the gumline. Keep the tip moving in short, sweeping, brushstroke motions (Figure 5). Do not apply the tip at right angles to the tooth surface because that will scratch the enamel or cementum.
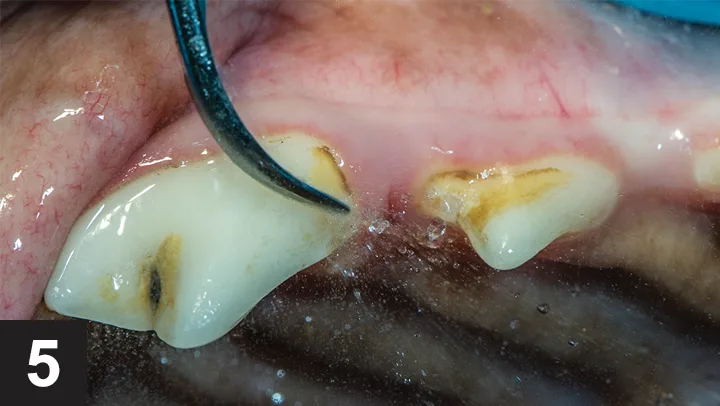
Use the side of the tip to ensure the correct amount of power.
5. Polish carefully with disposable prophy angles
Ultrasonic scaling results in micro-etching on the enamel. Polishing helps remove any remaining plaque and smoothes the tooth surface. Using disposable prophy angles for each case is economical and prevents cross-contamination. Pumice or polishing paste, usually containing fluoride, is placed in the rubber cup and on the tooth for polishing (Figure 6). Several seconds of light pressure per tooth is sufficient. Heavy pressure or prolonged time spent on a tooth may result in thermal damage to the dental pulp from excessive frictional heat. A copious amount of prophy paste should also be used to reduce friction. A slight flare of the prophy cup allows the tooth to be polished subgingivally; pay special attention not to polish the cementum, which can cause cemental damage.
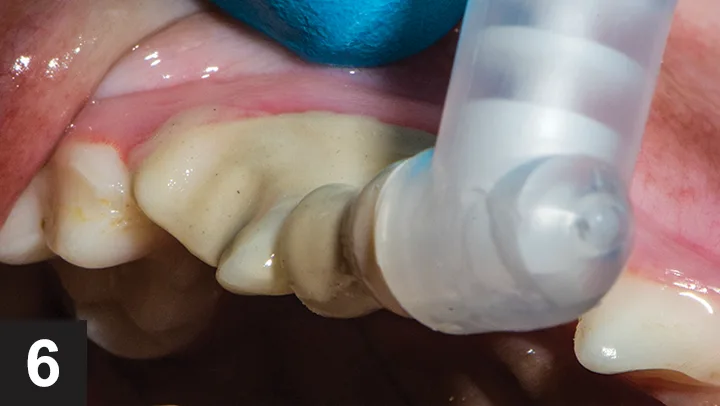
Applying pumice to the tooth for polishing with a disposable prophy angle
Conclusion
Rylee's teeth were cleaned, polished, and digitally radiographed, and her gingival sulcus irrigated. Sealant was applied to decrease plaque accumulation (Figure 7), and she was clearly comfortable when she awoke.
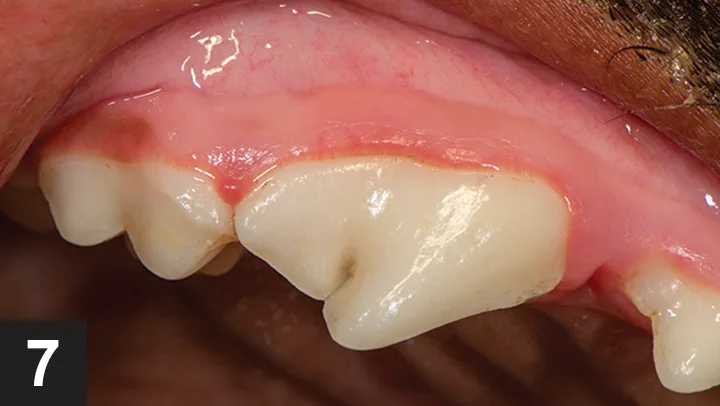
Rylee’s upper fourth premolar after cleaning and polishing gross calculus and gingivitis.
This article originally appeared in the January/February 2015 issue of Veterinary Team Brief.