Step-by-Step: Peripheral Catheter Placement
Amy Breton, CVT, VTS (ECC), BluePearl Emergency Veterinary & Specialty Hospital, Waltham, Massachusetts
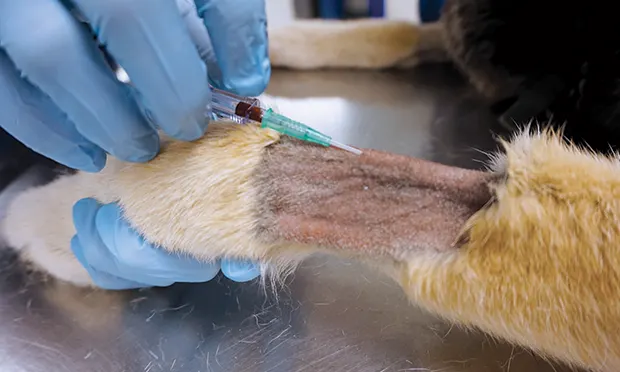
Use any any well-lit practice treatment area (eg, examination room, operating room) for placing a catheter in a patient.
Any member of the veterinary team (ie, veterinarian, veterinary technician, veterinary assistant) can legally place a peripheral catheter in most states in the United States, and practices should adhere to the law in their state.
Patients often behave unpredictably during this procedure and should be restrained appropriately (eg, using physical restraint, chemical restraint [sedation], restraint tools [gloves, blankets, muzzles]). Always have the necessary supplies (eg, clippers, antibacterial scrub, rubbing alcohol, gauze, medical tape, IV catheter, injection plug, 0.9% NaCl) on hand.
Step 1
Shave enough hair so the vein can be visualized (Figures 1 and 2). Depending on practice protocol, shave the area over the vein only, or the entire circumference of the leg. Shaving around the entire circumference helps ensure that hair and bacteria do not physically contaminate the insertion site when the catheter is taped.
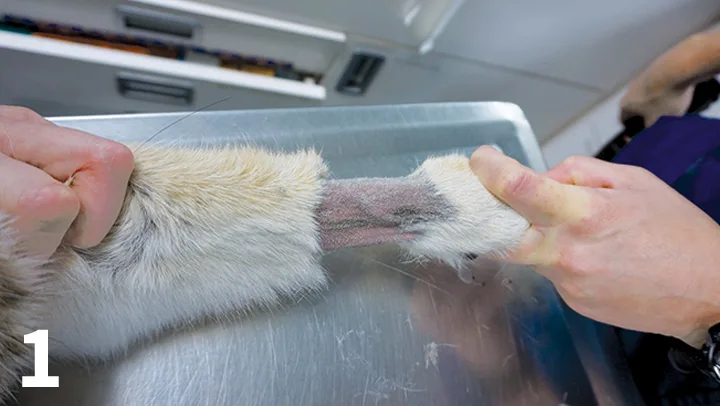
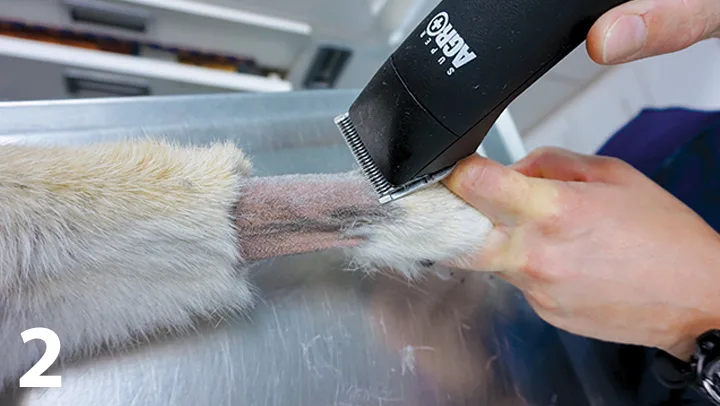
Shave the patient’s hair to visualize the vein.
Step 2
Nonsterile medical gloves should now be worn1; wearing gloves before this step may result in the gloves touching the shaved hair.
Step 3
Prepare the site in a manner similar to surgical preparation (Figures 3 and 4). Place an antibacterial solution (2%-4% ChlorhexiDerm or povidoneiodine) on sterile gauze and alternate with a rubbing alcohol gauze.1-3 The antibacterial solution should maintain contact with the skin for a full minute.2 Avoid palpating the insertion site following the scrub.1
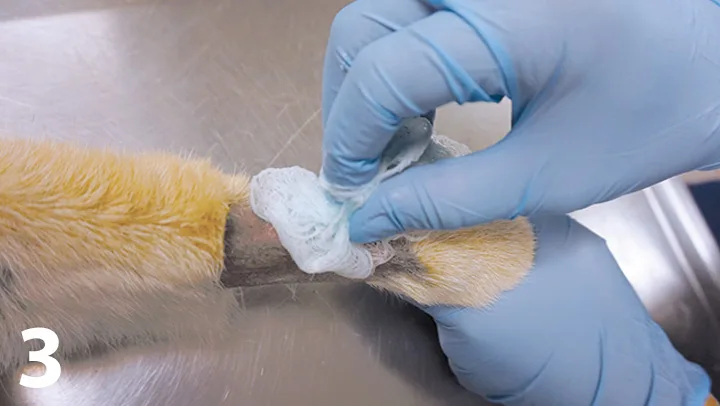
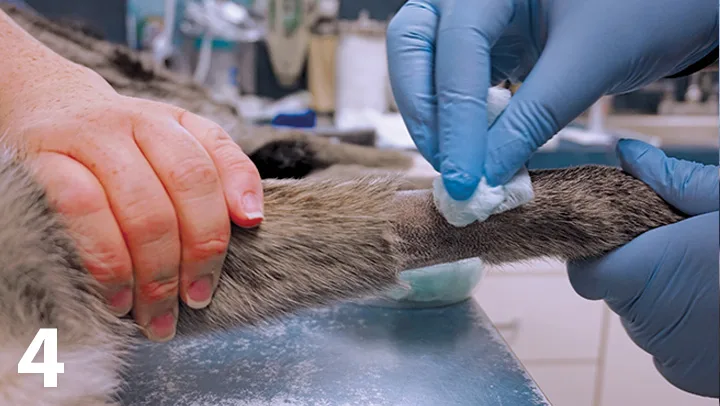
Prepare the site with an antibacterial solution on sterile gauze and a rubbing alcohol gauze.
Step 4
The catheter should not be touched when the package is opened. Discard any catheter that touches anything other than prepared skin.
Step 5
Before inserting the catheter, place any necessary restraint devices (eg, muzzle, towels, Elizabethan collar) on the patient. At this step, the team member placing the IV catheter and the team member restraining the patient have equally important responsibilities. One team member restrains the patient, positions the leg, and holds off the vein to occlude the vessel (similar to a tourniquet); the vessel dilates and fills with blood to allow placement of the catheter. The other team member prepares to place the catheter. The team member restraining also ensures team safety throughout the procedure (Figure 5). Most patients will try to pull their leg back when they feel the catheter.
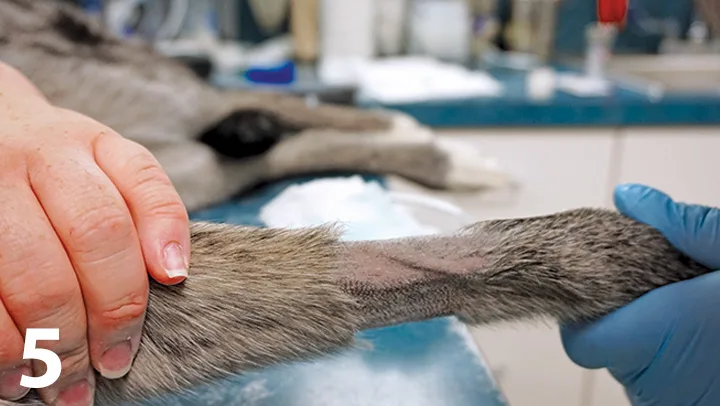
Restrain the patient while placing the catheter.
Step 6
Grasp the hub of the catheter firmly with the dominant hand, using at least 2 fingers and taking care not to touch the catheter itself. With the other hand, firmly grasp the patient’s leg below the area where the catheter will be placed to prevent leg movement during placement.
Step 7
The area for catheter insertion should be at a point that is as close as possible to the foot to allow for any subsequent attempts to use the same vein. Do not palpate the vein and do not touch the prepared insertion site.
Step 8
The slanted part of the needle tip, or bevel, should point upward so that the opening can be visualized. Insert the catheter at a 10° to 30° angle to breach the skin (Figures 6 and 7).3-5 A flash of blood should be visualized in the catheter hub (Figure 8). At this point, carefully level the catheter parallel to the vein and slowly advance forward (Figures 9 and 10) approximately 2 mm to 3 mm to ensure that it is fully seated within the vessel.
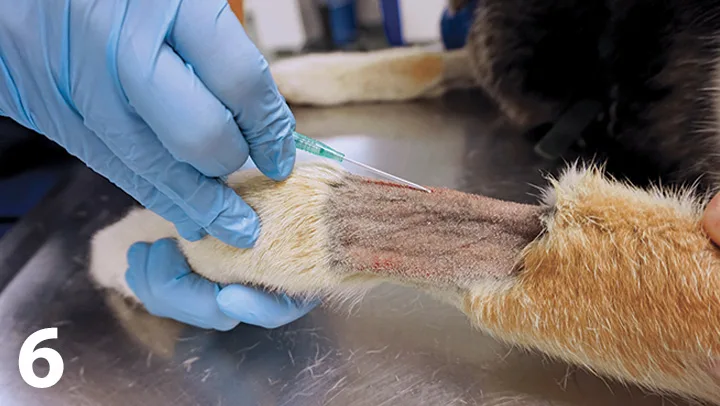
Figure 6 The catheter must be inserted at a 10°-30° angle to breach the skin.
Step 9
If blood is still flowing into the catheter hub and it has advanced smoothly to this point, advance the catheter off only the stylet and into the vein without moving the stylet. Using one finger (usually the index finger), push the catheter off the stylet only and all the way into the vessel (Figure 11).
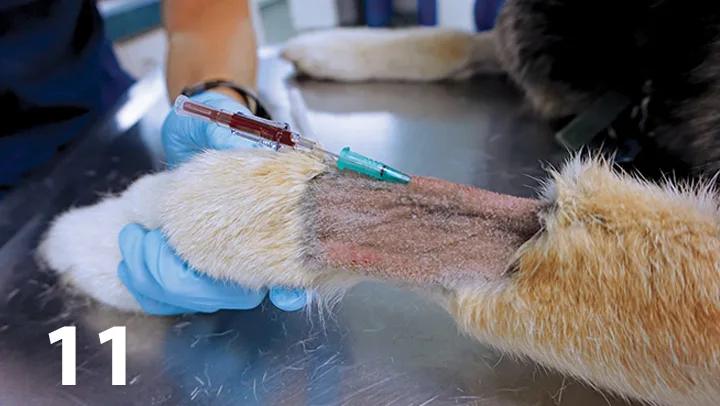
The catheter is pushed off the stylet and all the way into the vessel.
Step 10
Flush the catheter with 0.9% NaCl when it is fully inserted up to the hub into the vein, tape it, and wrap it securely. Heparinized saline is not necessary.6 Cap the end of the catheter with a sterile injection plug, extension set, or T-set.
Step 11
Consider an Elizabethan collar for patients that may be prone to removing the catheter from their leg.
Conclusion
A successful catheterization depends on a veterinary team well prepared with knowledge and understanding of the procedure’s basic principles and with all the needed supplies on hand.
Definitions
Catheter: A flexible tube with a long needle inside that is inserted into a vein
Stylet: The long needle inside the flexible tubing used to breach the skin to access the vein
Bevel: The small hole on the stylet.
This article originally appeared in the November 2015 issue of Veterinary Team Brief.