External Splinting for Pectus Excavatum in Kittens
Karen M. Tobias, DVM, MS, DACVS, University of Tennessee
Whitney DeGroot, DVM, University of Tennessee
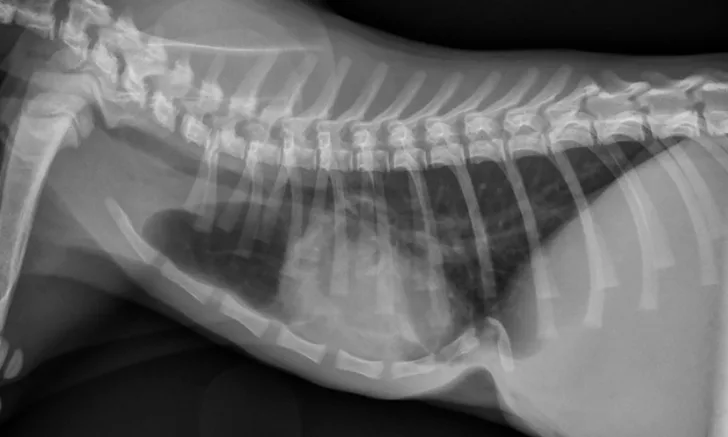
Pectus excavatum in a 12-week-old kitten. The caudal sternebrae are deviated dorsally, whereas the xiphoid process is pointed ventrally.
Pectus excavatum is a congenital, concave deformity of the caudal sternum that results in a reduced ventrodorsal thoracic diameter.1,2 The cause is unknown, although a hereditary component has been suggested.3 Pectus excavatum can result in compromised pulmonary and cardiac function due to decreased intrathoracic capacity and restriction of diastolic filling.2-4 Common clinical signs include a palpable concavity of the thorax, respiratory distress, exercise intolerance, tachypnea, cyanosis, and failure to thrive, although some animals may appear clinically normal.
Diagnosis is based on physical examination and thoracic radiography findings (Figure 1). Radiographs should show a sternal deformity and decreased caudal thoracic space secondary to dorsal deviation of the sternum.3,5 The severity of the deformity can be graded using 2 indices (ie, vertebral or frontosagittal; see Deformity Indices), although these indices may not correlate with the severity of clinical signs.4 Severity can also be evaluated with CT. A study in kittens found CT to be useful in identifying midline sternal deviation that could potentially cause more severe clinical signs, despite relatively mild skeletal deformity, because of diastolic restriction.4
DEFORMITY INDICES4,8
Frontosagittal index: The ratio of thoracic width at T10 measured on a dorsoventral radiograph and the distance from the center of the ventral surface of the vertebra overlying the deformity to the nearest point on the sternum (normal, 0.7-1.3)
Vertebral index: The ratio of the distance from the center of the dorsal surface of the vertebral body overlying the deformity to the near point of the sternum and the dorsoventral diameter of the centrum of the same vertebra measured on a lateral radiograph (normal, 12.6-18.8)
Three types of surgical repair have been described in cats: external splinting, internal splinting (using plates or rods), and sternebral pinning combined with external splinting.1,6,7 Reports have suggested that external splinting can be attempted in kittens (typically those less than 4 months of age) if the sternebrae are still pliable.6,8
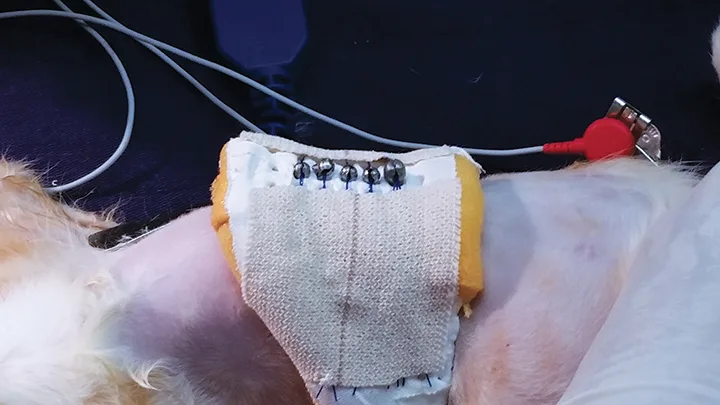
The brace should be created from a moldable (preferably radiolucent) material and should be U-shaped to fit around the ventral thorax, extending approximately three-fourths of the way to the spine. Surgical scrub sponges can be used to pad the edges of the brace to prevent pressure sores, and holes can be created along the ventrolateral aspects of the brace to allow for suture passage. Percutaneous sutures should be placed around the sternum (ie, circumsternal) and through, around, or over the brace. The sutures should be tightened and secured so the sternum is pulled outward. To allow evaluation and cleaning of the region, the sutures can be secured by tying in a bow or with replaceable split shot fishing sinkers to allow for loosening and/or retightening. After placement of the circumcostal sutures and brace, lateral radiographs should be obtained to evaluate the position of the sternebrae and verify improvement in the thoracic width as compared with pretreatment measurements (Figure 2). The brace should be kept in place for several weeks until the sternum is sufficiently stiff to prevent inward displacement.
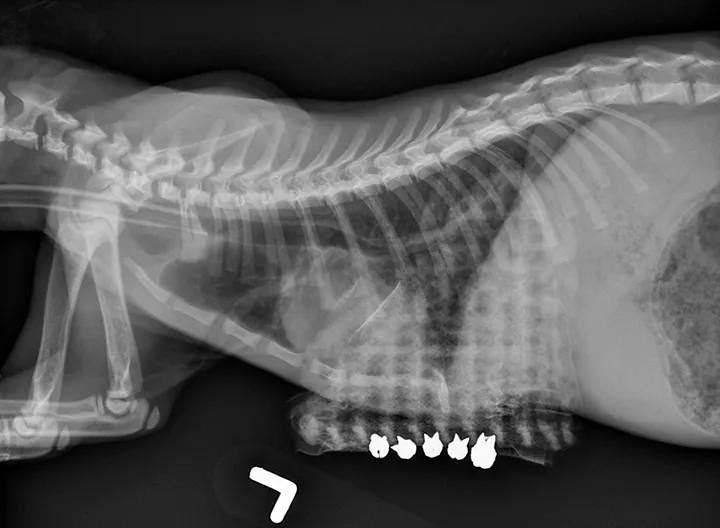
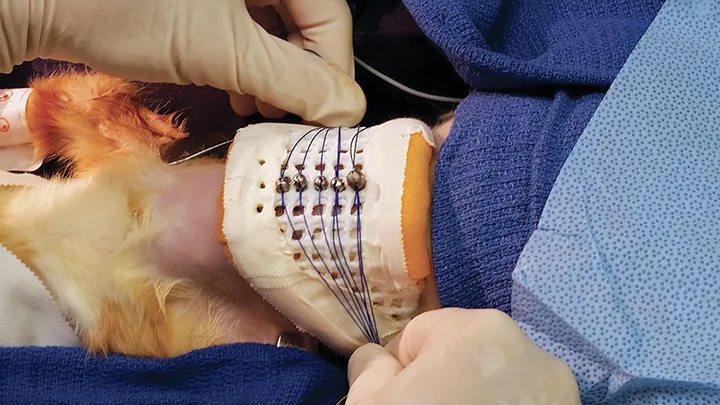
Patient in Figure 1. The sternum has been pulled ventrally and secured by circumsternal sutures to an external brace with removable split shot fishing sinkers.
Potential complications of external splinting include inadvertent lung or heart puncture, pneumothorax, re-expansion pulmonary edema, infection associated with the sutures, moist dermatitis from the splint, sinus tracts around the sutures, and deformity recurrence. While the brace is in place, patients must be strictly exercise-restricted and, preferably, kept away from other cats. Prying or scratching at the brace—by the kitten itself or other cats during play—must be prevented, as this can result in suture loosening and/or loss of reduction.
Weekly rechecks are recommended to ensure the brace has not loosened and that there is no evidence of infection at the suture sites. If infection is suspected, the replaceable split shot sinkers can be opened and matching suture ends can be clamped with hemostats until the brace can be elevated from the patient’s chest enough to examine the suture sites and facilitate wound care. Sedation is recommended any time the sutures are to be loosened.
Radiography every 2 weeks is recommended to ensure the defect remains reduced. The brace should remain in place for 4 to 8 weeks, depending on patient age, until the sternum feels palpably noncompliant after splint removal.3,6 If reduction fails with external splinting, partial sternectomy, or sternal wedge resection and internal splinting, may be required. Recurrence of clinical signs4 and evidence of recompression6,9 have not been reported in follow-up data for kittens treated with external splinting alone.
There have been no controlled studies to determine whether all kittens with pectus excavatum require correction. The authors primarily perform external splinting on kittens showing clinical signs (eg, respiratory difficulty, exercise intolerance, poor growth). In some of these kittens, final indices after splint removal are not much improved over initial measurements, but clinical signs have resolved. It is possible that the splint prevented the condition from worsening while the kittens grew or that other, unmeasured indices (eg, diastolic volume) were improved by splinting.
STEP-BY-STEP
EXTERNAL SPLINTING IN KITTENS
WHAT YOU WILL NEED
Moldable splint material (preferably radiolucent)
Nonabsorbable suture (0 or 2-0) material on a taper needle
Hemostats and needle drivers
Split shot fishing sinkers
Adhesive tape
STEP 1
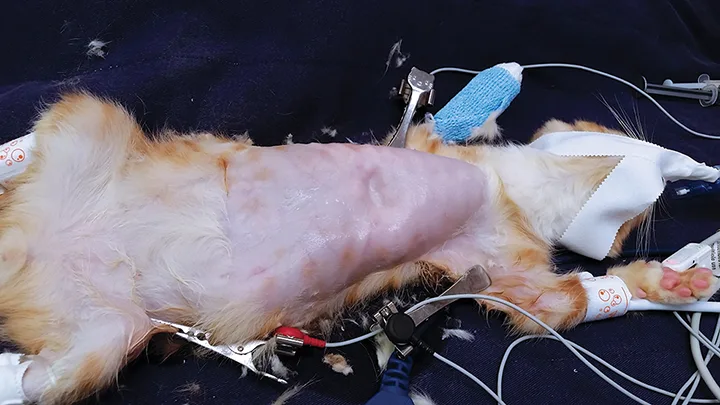
Anesthetize the patient and position in dorsal recumbency. Aseptically prepare the ventral thorax.
STEP 2
Place the first suture, passing the needle underneath the xiphoid or the palpable caudal-most aspect of the sternum and keeping it adjacent to the dorsal surface of the cartilage. Place a hemostat at the suture ends to maintain them as stay sutures.
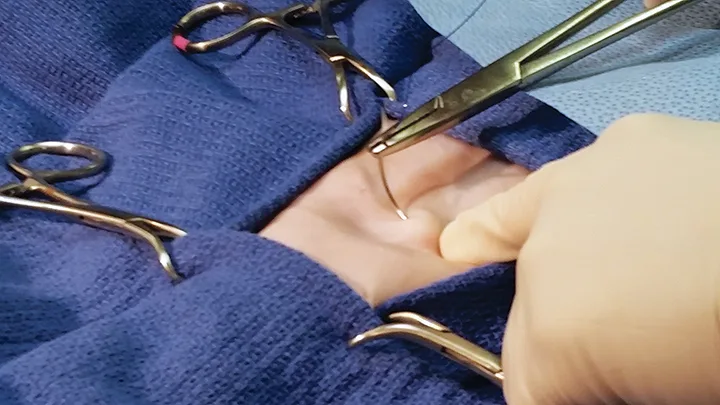
STEP 3
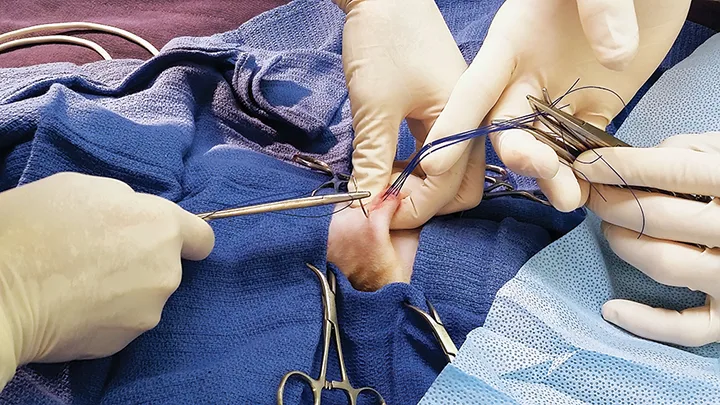
Place gentle upward traction on the first suture, and place a second suture around the sternum, just cranial to the first, in the same fashion. The needle must be directed to pass dorsal to and circumferentially around the sternum. Exercise caution to avoid damaging essential intrathoracic structures, including the heart and lungs.
STEP 4
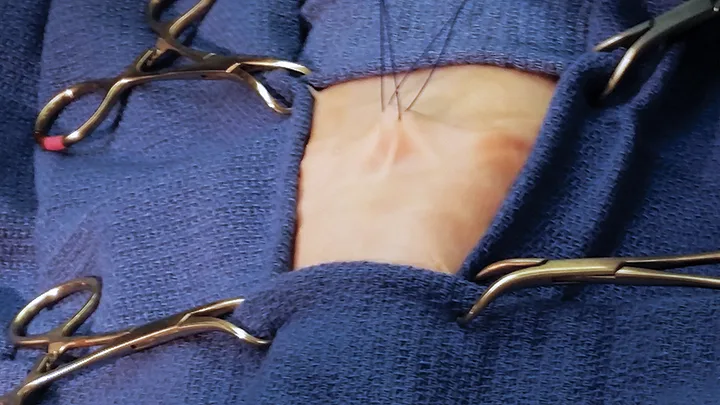
With an index finger underneath the sternum, apply upward pressure to reduce the sternal defect and isolate the sternum from the lung and heart. While the sternum is secured in this position, additional sutures can be preplaced, as described above, until the sternal deformity is spanned.
STEP 5
Separate the paired suture ends and pass them through the holes in the brace to either side of the midline. Resecure the sutures with hemostats.
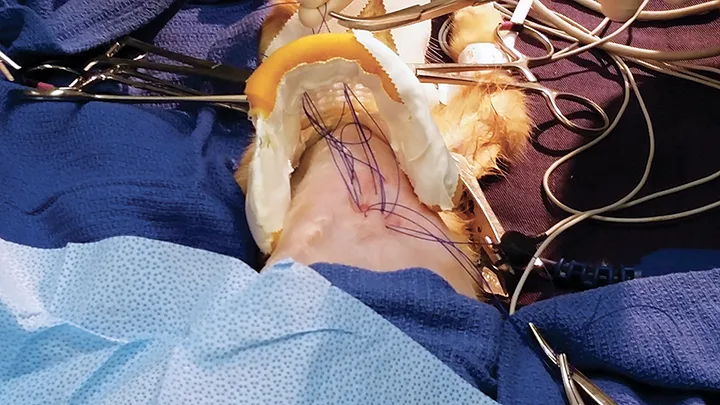
STEP 6
Once all circumcostal suture pairs have been passed through the brace, pull the sutures tight to reduce the sternal defect and secure them together by tying in a knot or bow or by clamping them with a removable split shot fishing sinker.
STEP 7
Secure the suture ends with adhesive tape; do not cut them. The chest and brace can be covered with a bandage or small cloth (ie, t-shirt) to prevent self-trauma.