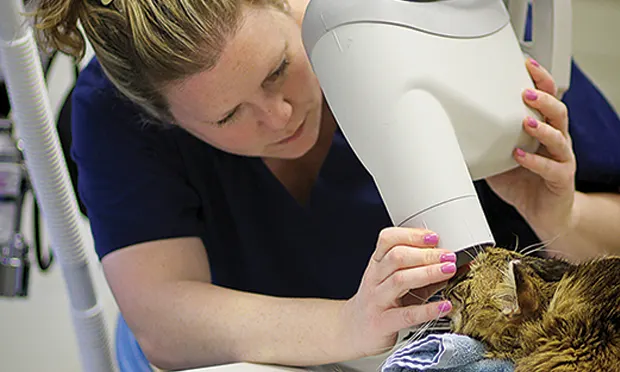
Dental Radiographs: Positioning Is Everything
Annie Mills, LVT, VTS (Dentistry), Florida Dentistry & Oral Surgery, Lake Mary, Florida

A thorough assessment with full mouth radiographs is an important part of a Comprehensive Oral Health Assessment and Treatment (COHAT). The goal is to find pathology and provide appropriate treatment to prevent oral pain. However, time management concerns and a steep learning curve often deter veterinary professionals from performing dental radiographs on a regular basis.1
The following techniques can ease this process for veterinary technicians and ensure the quality of dental radiographs and patient care.
Parallel Technique
The relatively simple parallel technique is used to image the mandibular caudal cheek teeth on small dogs and cats.
For large dogs, use this technique to image teeth from the third premolar to the last molar. This portion of the oral cavity has room enough to place the sensor parallel and adjacent to the desired teeth, on the lingual aspect of the mandible. Then, aim the tube head perpendicular to the sensor.
Bisecting Angle Technique
This technique, which is used to image the rostral mandible and entire maxilla, is the only technique that produces an image without distortion when done correctly. Some technicians find the bisecting angle technique difficult to grasp; however, it can be simplified with proper patient and equipment positioning.
When imaging the maxilla, place the patient in sternal recumbency with a towel under the chin (Figure 1) so that the maxilla is parallel to the horizon (ie, the table).
When imaging the mandible, place the patient in dorsal recumbency with a rolled towel under the neck to extend the head with the mandible parallel to the horizon (Figure 2).
The following analogy can be used to help visualize this technique: Imagine the generator as the sun, the sensor as the ground, the tooth as the object, and the radiograph image as the shadow that is cast by the sun. Then, visualize the object outside at noon, when the sun is very high in the sky. The shadow that is cast is very short. Conversely, the shadow is long at 6:00 pm, when the sun is low in the sky. When the tube head (ie, the “sun”) is placed at the correct angle (ie, between noon and 6:00 pm), it produces an image without elongation (ie, the image is long or appears to be stretched) or foreshortening (ie, the image is short or “stubby”).

Proper patient positioning to image the maxilla

Proper patient positioning to image the mandible
For example, image the caudal cheek teeth in the maxilla with the tube head at a 60° angle from the horizon.2 When the patient is positioned with the maxilla parallel to the horizon, the sensor can also be placed parallel to the horizon (ie, inside the oral cavity and adjacent to the desired teeth), making it much easier to visualize the angle.
Sensor Placement
Place the sensor horizontally inside the oral cavity, with the cusp tip of the desired teeth at the edge of the sensor. Placing the sensor inside the oral cavity will provide enough room to catch the radiograph image.
Radiographs should be taken in the same order each time. Starting with the right maxillary molars, move the sensor and tube head around the entire arch until the left caudal maxilla is reached. Then, position the patient in ventral recumbency and repeat the process, starting with the left mandibular molars. Continue around the arch until the right caudal mandible is reached. This sequence is suggested because full-mouth-series templates included in most digital software programs are arranged in this order and will result in the mirror image for correct viewing of radiographs.

If a digital intraoral system is used, the goal is to achieve radiographs within 5–10 minutes for a cat or small dog and within 15–20 minutes for a large dog. Hands-on training and cadaver practice will significantly decrease the time needed for acquiring a full mouth series of radiographs.
This article originally appeared in the January/February 2015 issue of Veterinary Team Brief.